Hair Animation
Hair Tool give you option to both:
- bone chains generation,
- adjust automatic skinning,
- ability to animate generated bones using simple jiggle physics.
Note: This only works on mesh hair (there is no way to rig curves in blender).
Generate Bones
In mesh edit mode: Ctrl+Shift+H > Generate Bones will create bone chains for selected mesh strands (islands) and assign weights to them. Setup Steps:
- convert curve hair to mesh using convert hair to mesh
- in mesh edit mode select hair strands (mesh islands) that you want to animate.
- use: Ctrl+Shift+H > Generate Bones
- in operator properties panel (F9) can tweak options like: bones count, starting position offset etc
Two other important option under Ctrl+Shift+H > 'Generate Bones' operator is
- Target Rig if set then, generated bones will be automatically inserted to your character rig.
- Parent bone - usually head bone of your character rig, to which generated bones will be parented. Hair deformations won't look good if it is not set.
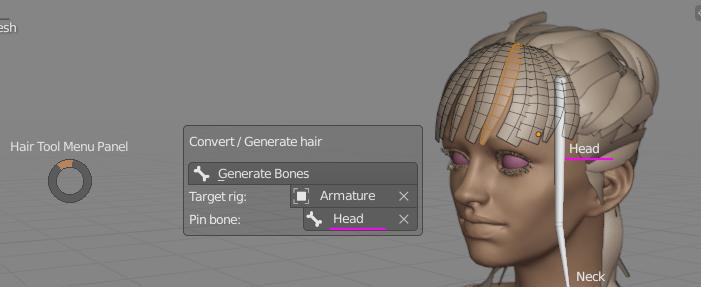 Usually character 'head' bone can be used as 'Parent bone' (hair bones parent)
Guide Strips Cache
Bones are generated based on mesh haircard, that are simplified into strips which then guide bone placement. Guide strips generation is done automatically when you generate bones, but you can also do it manually using 'Generate Mesh Cache' button - placed next to 'Generate Bones' - visible as Refresh icon. With it you have manual control over 'strips' simplification (Ctrl+MMB Scroll) and smoothing (Shift+MMB Scroll)
use [Ctrl+MMB Scroll] - for 'strips' simplification and [Shift+MMB Scroll] for smoothing
Note: For performance reasons guide strips are generated once, and then reused for each bone generation. If you modified hair mesh and bone generation does not seem to follow your changed mesh - try to regenerate guide strips using Refresh icon.
Parameters
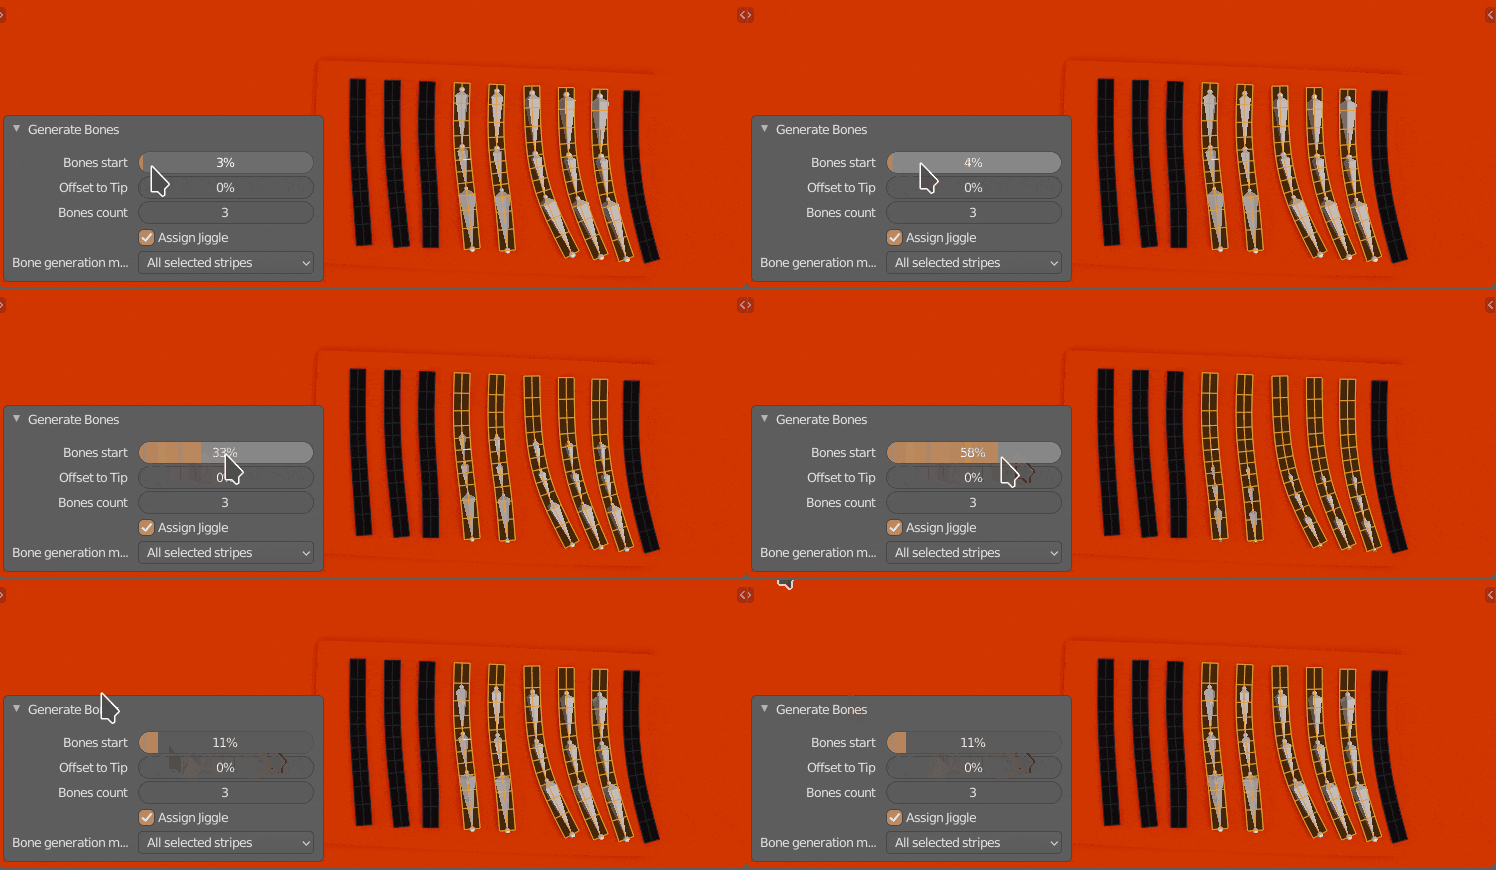 Bones Start - Place first bone at some start distance from strand root location
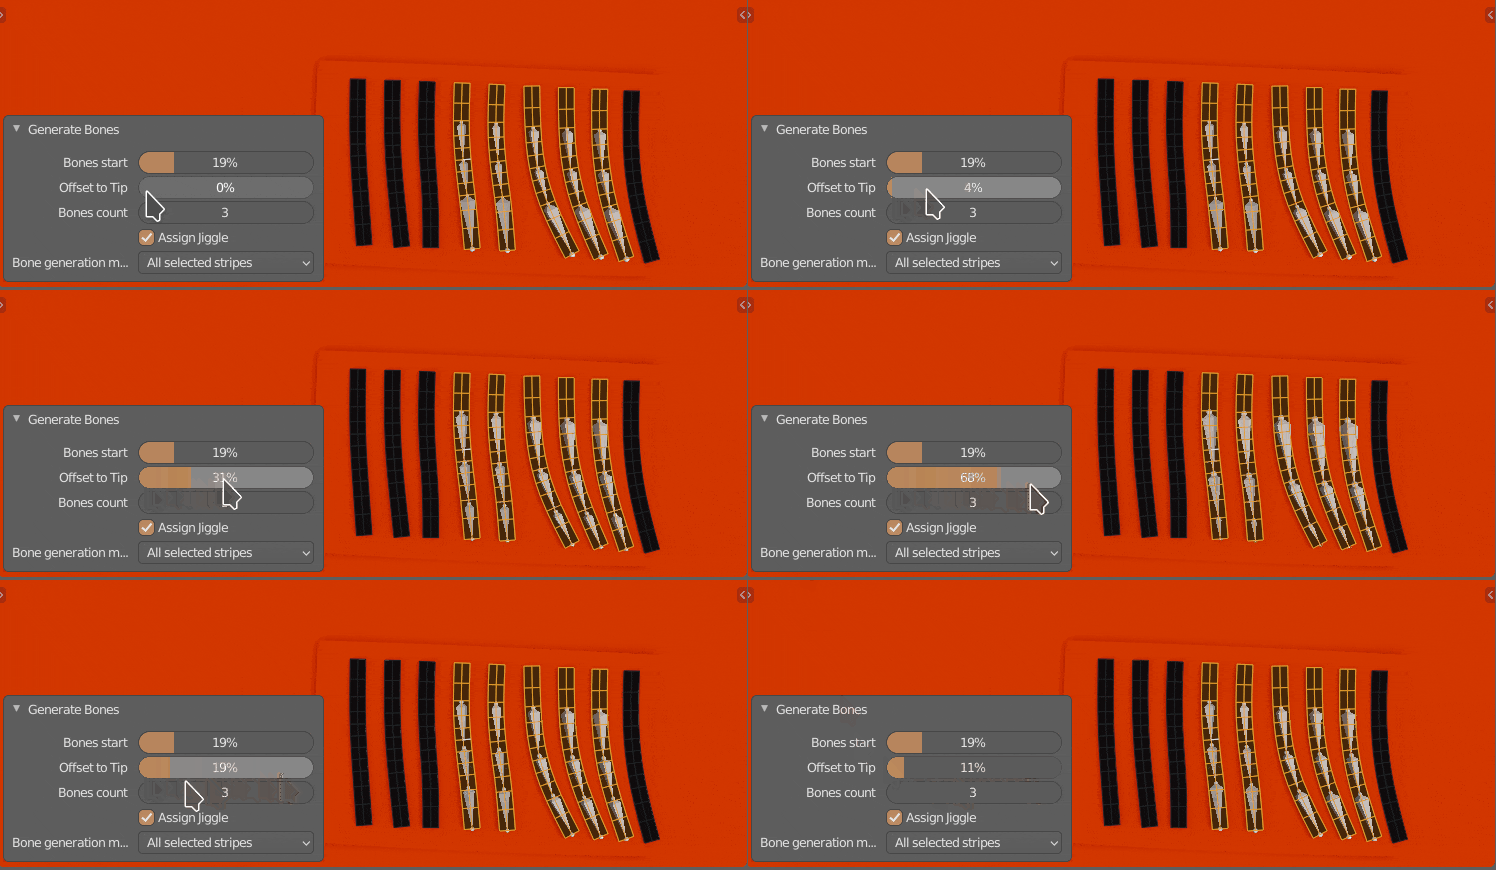 Offset To Tip - Bunch up generated bones more toward strand tip
- Assign jiggle - Assign jiggle physics to generated bones
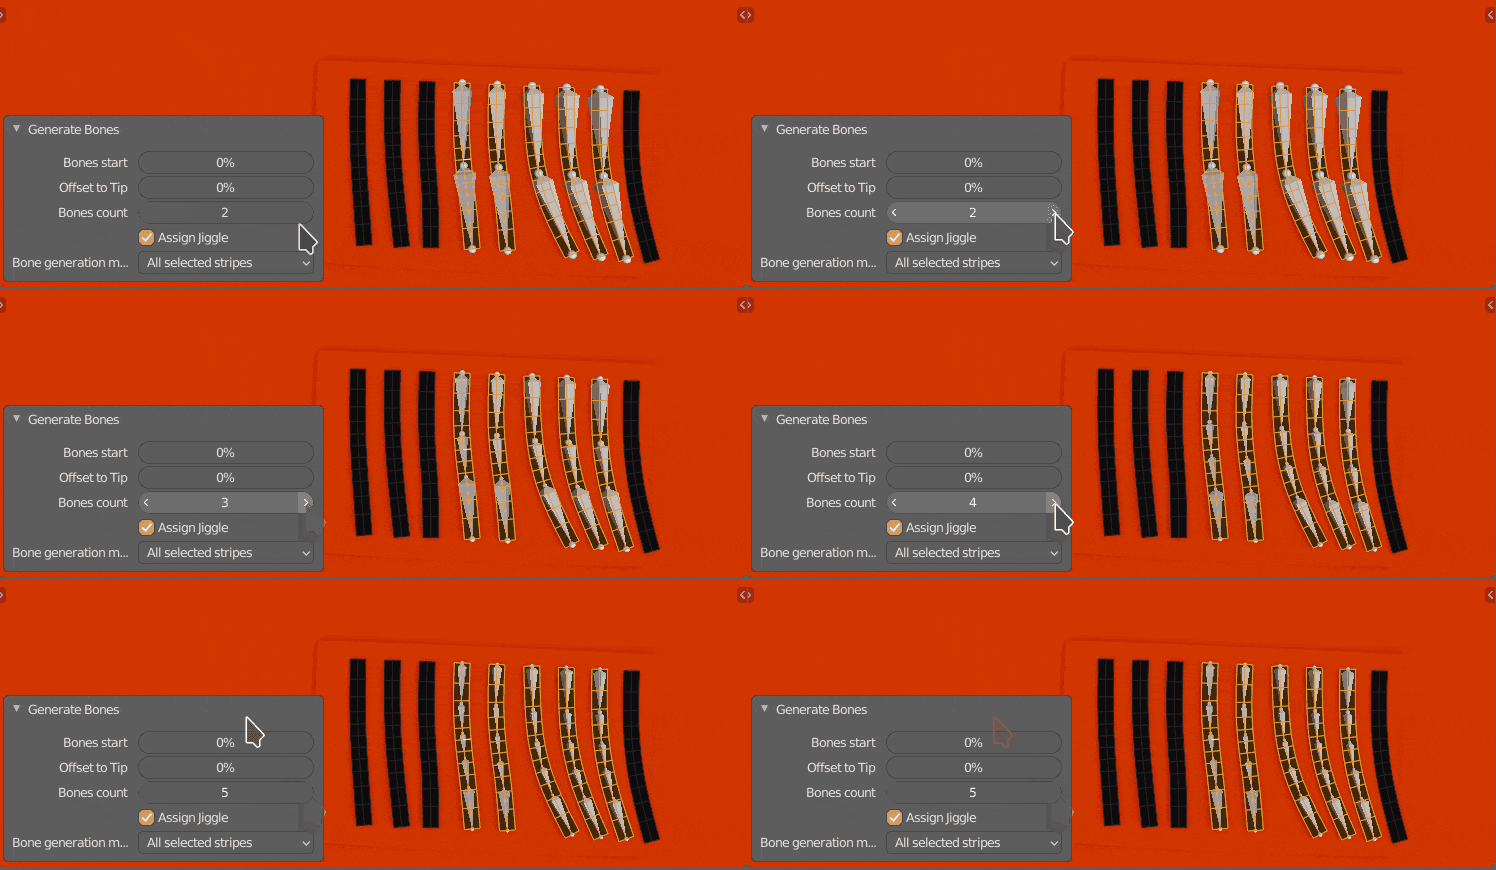 Bones Count - Bones Count
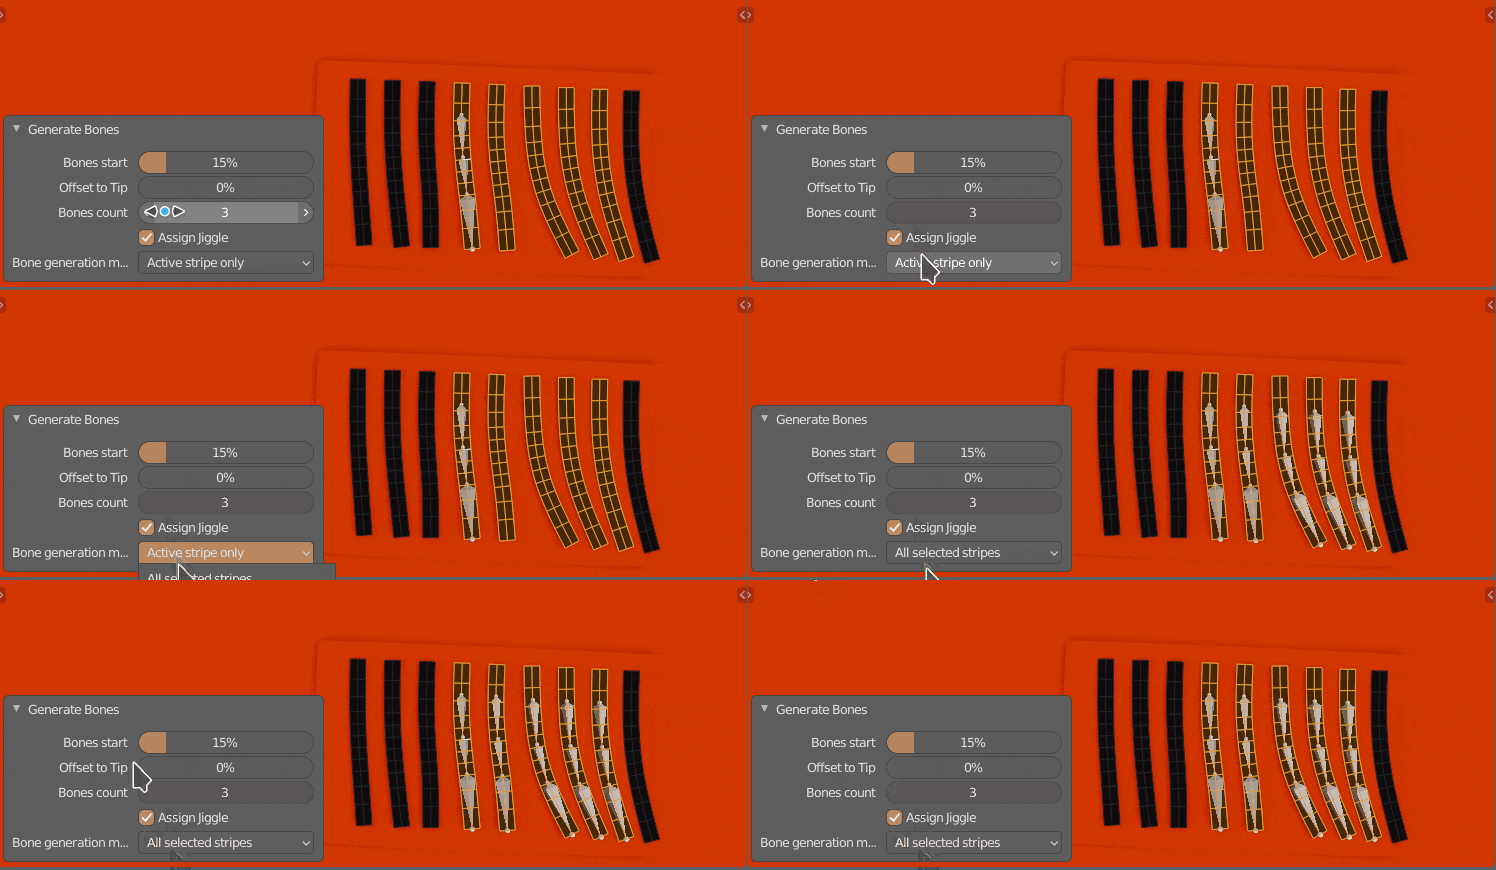 Bones Generation Mode - Generate separate bone chain for each selected mesh strand, or generate only one chain for mesh island with active face/edge/face (other selected islands will use active chain for skining - good for clumps)
Hair Skinning
This operator will automatically assign weights to bone chains giving more natural, hair like results, compared to Blender's built-in 'Automatic Weights' option. Each haircard will receive weighted which will make it move as one piece of geometry (its vertices won't stretch apart).
This operator is available under Ctrl+Shift+H > Skin Haircards to Bone Chains in: object, edit and weight paint mode. If executed in edit mode or weight paint mode, then only selected haircards can be skinned to bones.
In this demo we generate weights to one of the Hair Presets from Hair Tool Library. I used Wobbly Wiggler addon but HTool has its own (simpler) simulator see here
Note: This operator requires Head bone to be set. Usually it should be detected automatically.
Note: You can skin only selected haircards to selected bone chains by running this operator in edit mode or weight paint mode. And in Bone Source pick:
Selected Pose Bonesoption. This way you can force one hair clump to follow one bone chain.
Parameters
- Armature - target armature from which hair bones chains will be picked from. By default it will use selected mesh object's armature modifier target.
- Head bone - head bone of your character rig,
- Bone Source - Collection or Selected pose bones,
- Split Strands - if enabled it will try to skin each haircard as one piece of geometry (its vertices won't stretch apart). Default: On
- Smooth Factor - Additional post processing smoothing of generated weights. Default: 0.5
Jiggle Physics
Hair Tool comes with built-in jiggle physics system that can be used to animate hair bone chains.
Note: From this simple built-in jiggle simulator I created a separate addon called Wobbly Wiggler which support: collisions, mouse interaction with any bone, simplified baking, making simulation result cyclic etc.
If you enabled 'Assign Jiggle' when creating bones, then HT will automatically add jiggle physics to new bones. You can edit jiggle physics in armature POSE MODE:
- change time step
- add collision to selected bones (other bones will bounce from collision bone)
- create jiggle physics presets (with various mass, stiffness, damping, gravity parameters) and assign these presets to selected bones
Simulation Mode
Jiggle Physics can be run in two Modes:
- Interactive - good for mouse interaction with jiggle bones, but it won't work when rendering animation
- Animated - only works when animation playback is enabled. Useful when rendering animation.
There is also option to bake jiggle sim into animation using those steps
Physics presets
You can create multiple physics presets in Hair Tool using [+] icon.
To assign physics preset to bones:
- select target bones
- open triangle menu and select 'Assign jiggle to bones'
- you can remove selected bones from preset using same menu
Note: If you have any bones selected when creating new physics preset, then those bones will be automatically assigned to new physics preset.
Baking Jiggle Animation
Jiggle physics can be baked to animation using following steps:
- Select jiggle bones and enable Simulation (in Animated mode)
- Pose mode > Animation > Bake Action, with these settings:
- only selected bones
- visual keying
- overwrite current action
- Bake Data: Pose Mode
- Channels: Rotation only
- Press OK
Don't forget to turn simulation off after baking, to prevent running jiggle physics on top of baked jiggle animation.
Collisions
Only bone to bone collisions are supported. You can add collision to selected bone using 'Add Collision' button. Other jiggle bones will bounce from it.
Note - Bone to mesh collisions are not supported.
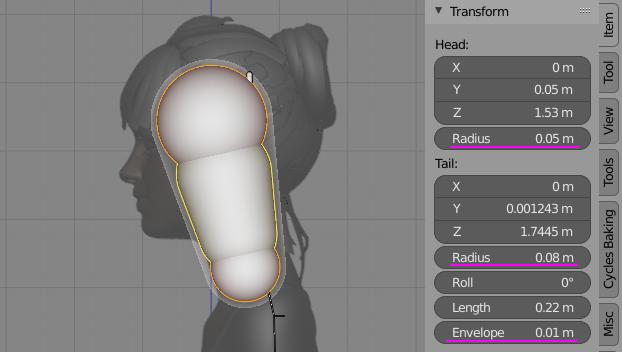
To define collision shape use bone envelope properties:
- head radius ( [Alt+S] - default blender hotkey to edit radius size)
- tail radius ( [Alt+S] - default blender hotkey to edit radius size)
- envelope (works as additional collision margin - pushes colliding bones more outwards)